Gandalf said it best, “you shall not pass!” or shall I?

For those of you wondering Gandalf? it’s a Lord of the Rings reference… more importantly the Professor kicked off the week discussing the format for this week’s lessons and touched on the details we learnt from last week. This week would see progression towards techniques to putting people into the guard. But before going into those details he had designs on teaching us a guard pass so good it will work on anyone, even black belts!
We kicked the lesson off with a warm-up, consisting off running, side-stepping and then into an interesting exercise which was geared at posture and connections when in a standing circumstance. The Professor also reminded us all that jiu-jitsu does start standing up and all the concepts of connections still apply!

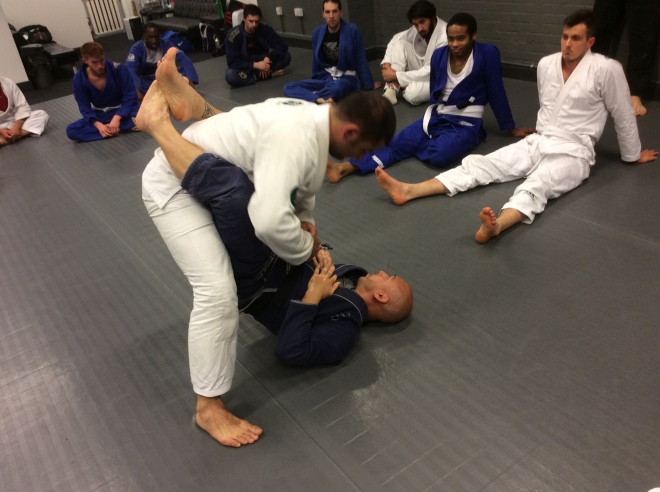
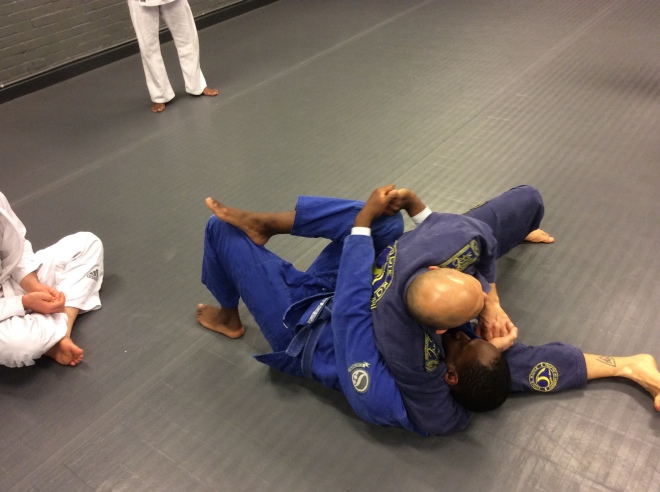
After we completed the exercises, the professor proceeded to guide us through the basics of the guard pass.

IMG_0369
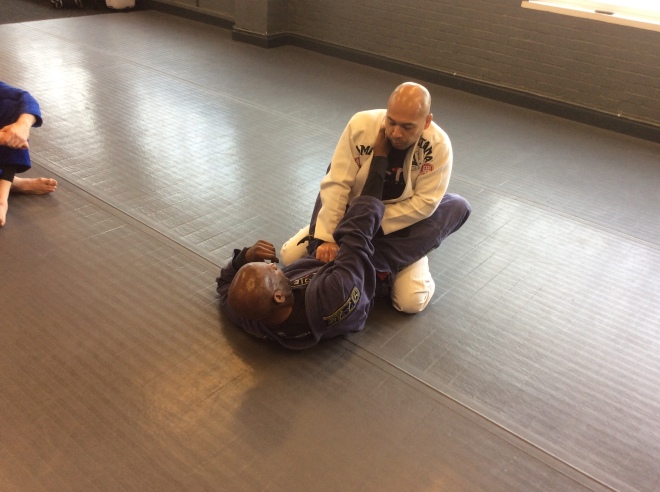
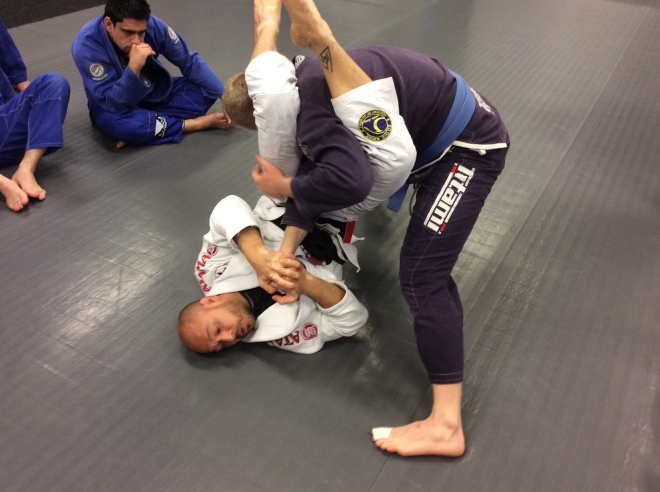
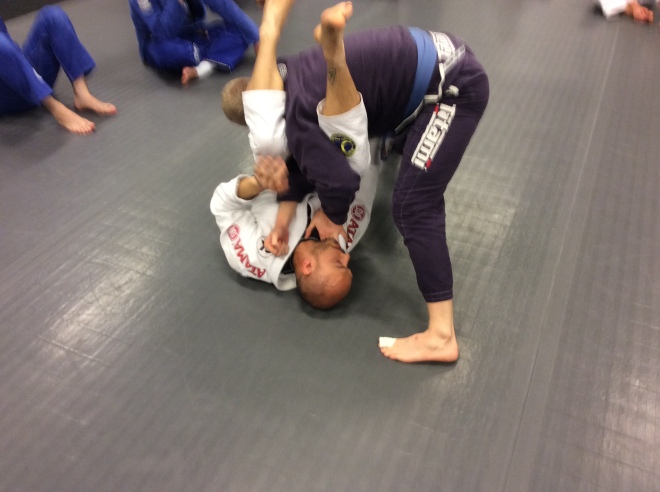
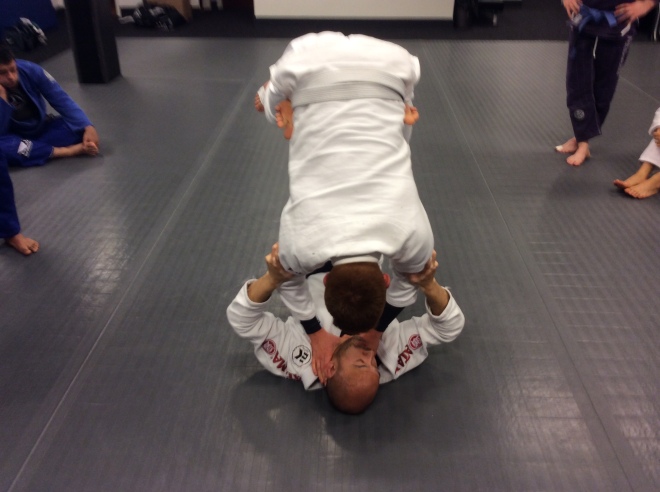
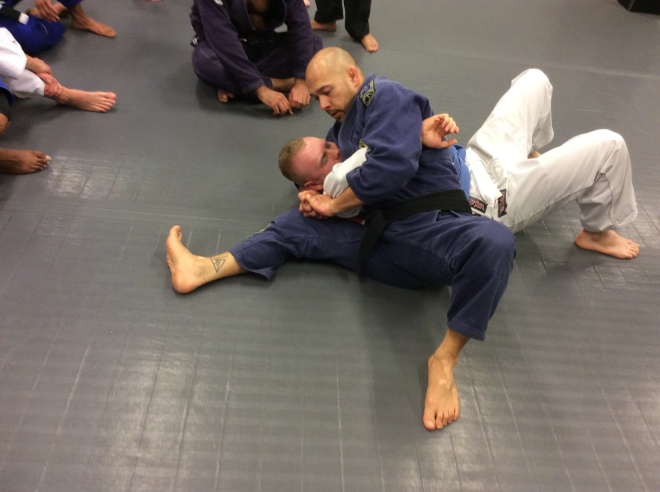
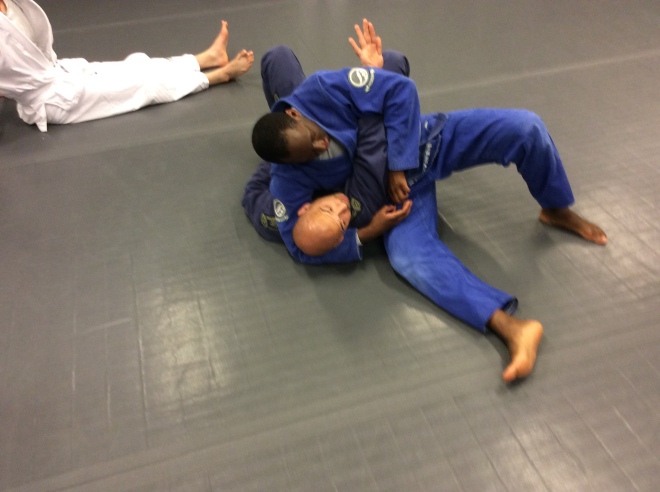
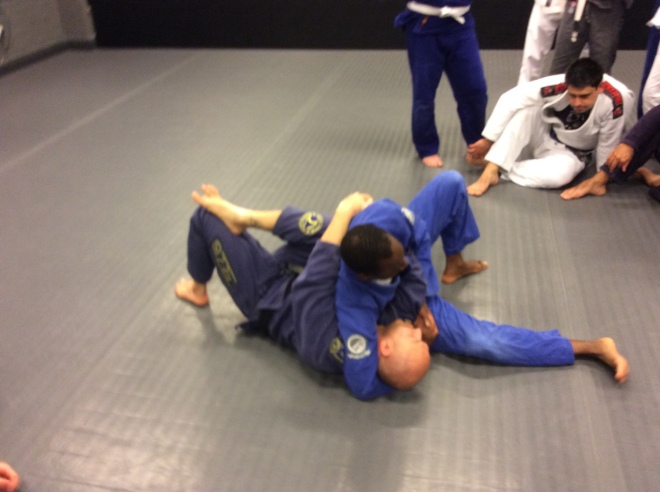
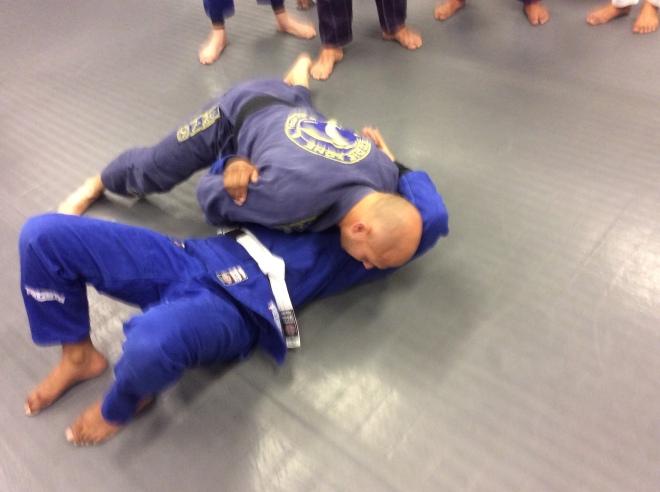
The importance of connections were again paramount, down to the posture in the guard, positioning of the knees, positioning of the arm on the person’s waist. The initiation of the guard pass was interesting as it seemed to depend on the person, who has you in their guard, attempting to pull you down into the guard to control you. Normally done by grabbing the collar, from here Professor demonstrated techniques to prevent or make it very difficult to pull you down into the guard, even if the person is extremely strong.

IMG_0373

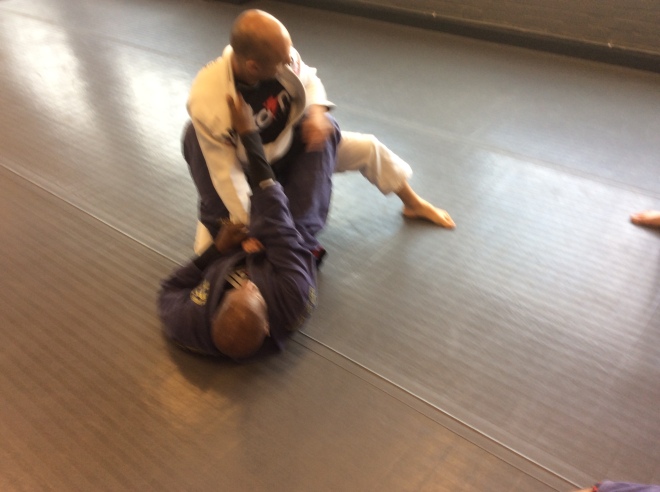
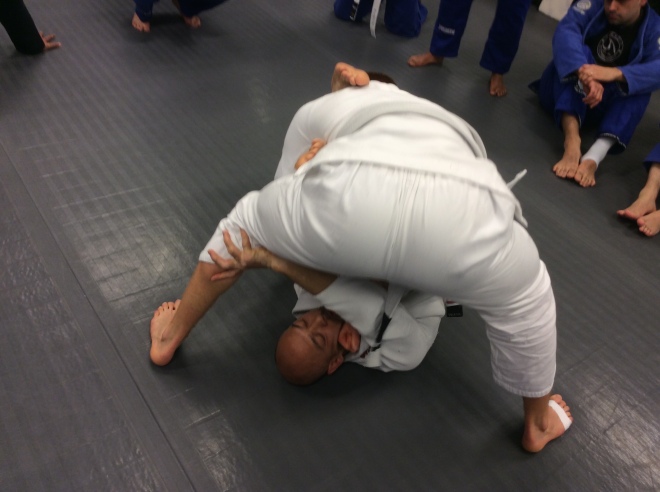
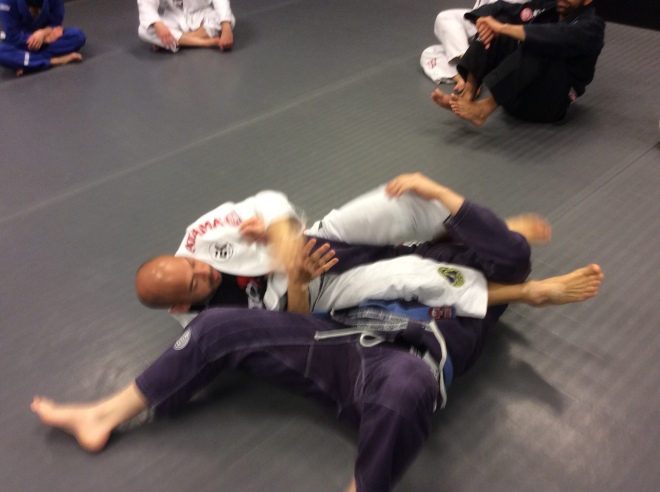
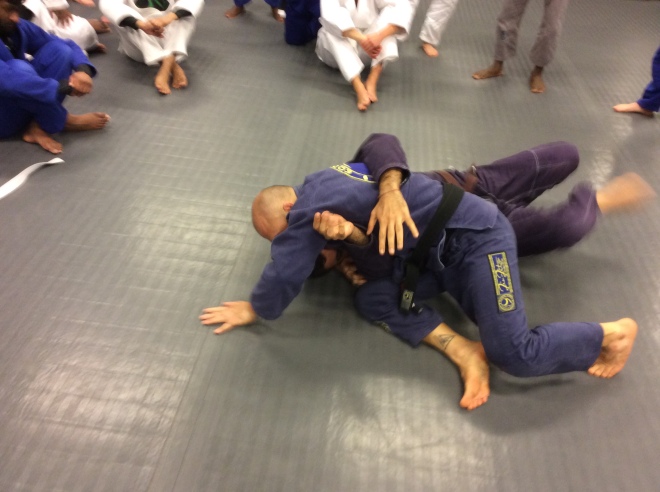
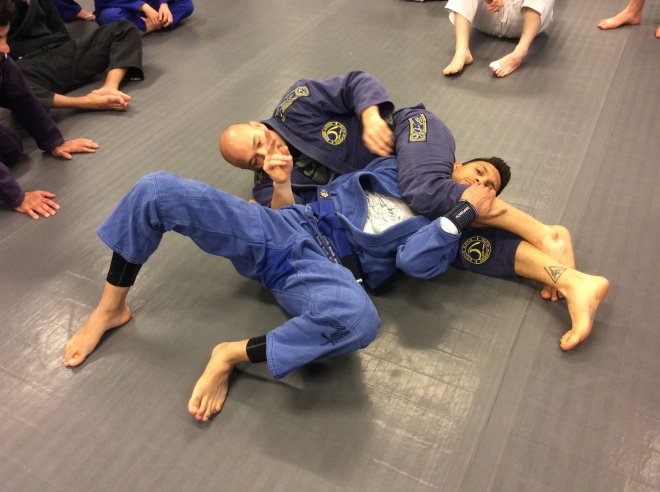
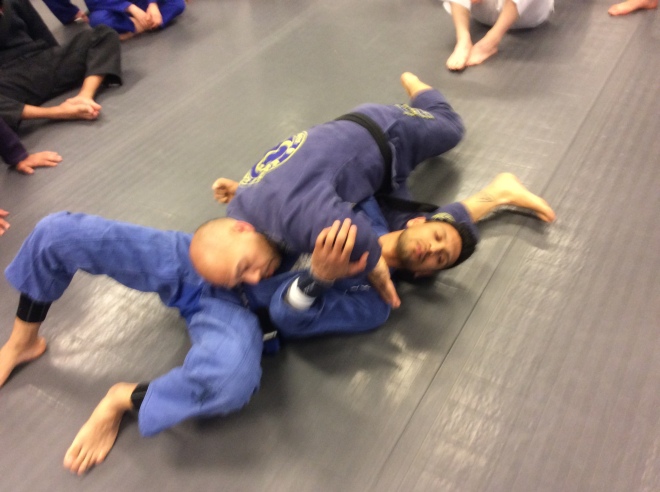
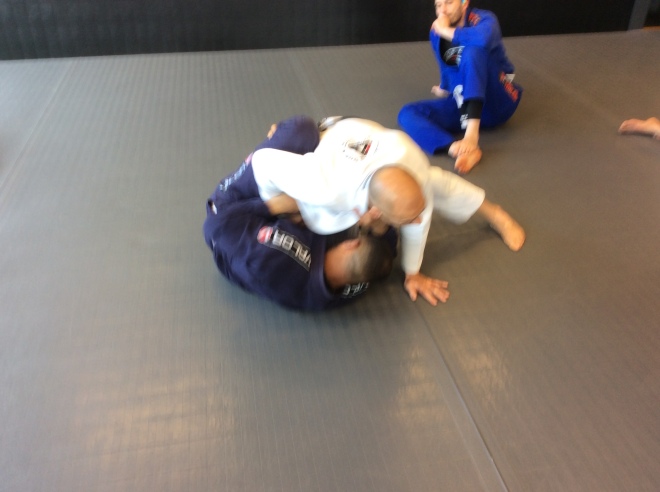
Then maintaining strong connections to the person in the guard to open the guard or force them to open the guard. With this done, working the position around the leg and driving your body forward to put the person at the bottom in an uncomfortable position as you move round to obtain a cross body position.

IMG_0379

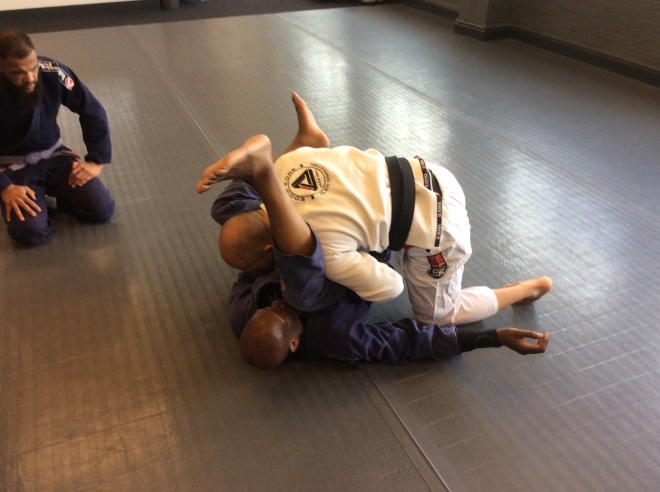
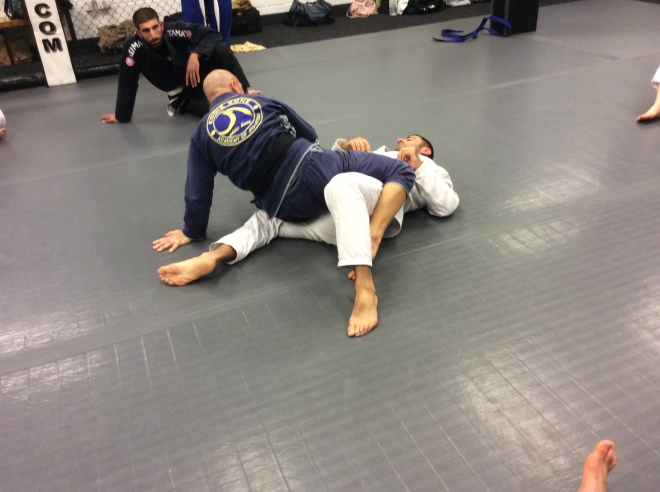
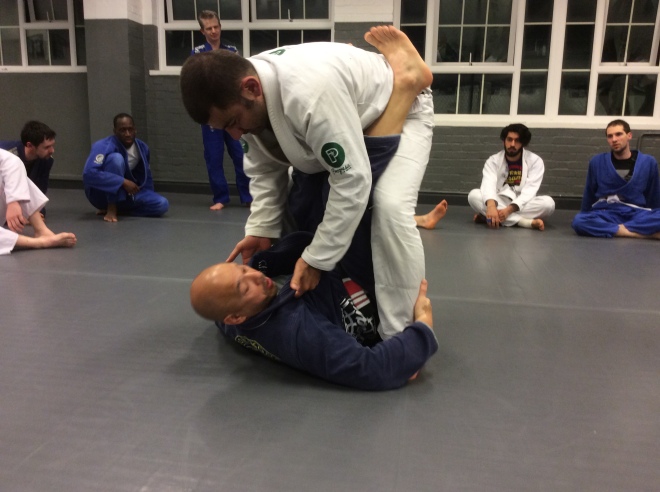
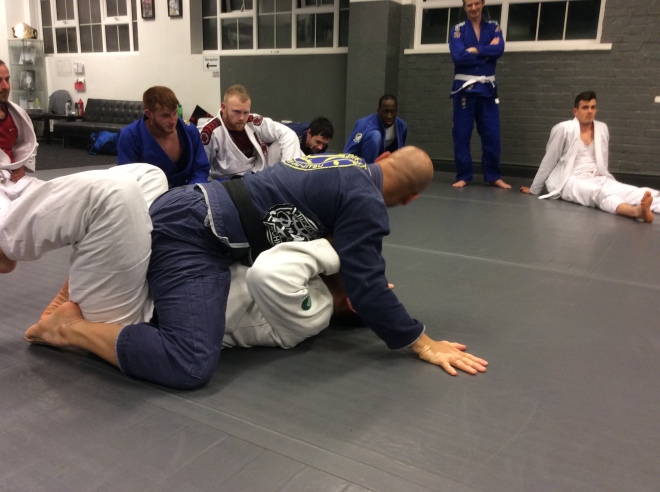
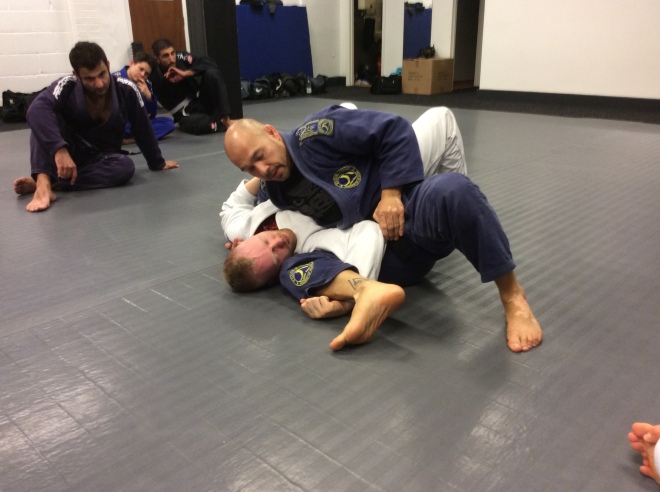
We practiced this a few times, with the Professor breaking us at different points to correct common mistakes being made. He also demonstrated on different individuals and using different body types to demonstrate for him, under his direct instruction to prove a point on certain details.

IMG_0402

The lesson concluded there, with the Professor recapping the importance of certain connections when attempting this pass, also mentioned a lot was maintaining proper structure in positions to make the pass possible.

My thoughts, I struggled with this particular technique mainly due to the position i needed to have when inside someone’s guard. Sitting on my knees put pressure on my ankles which had always been uncomfortable for me and doing this no exception. It appears i’ll need to find a way of getting comfortable to be able to do this pass.

“Tapping out!”


Doubling down

With a continuation of the week’s lessons the Professor, as promised, added details of the double leg ankle sweep to incorporate with the lessons on the arm lock/bar. This adds a key dynamic to the classes we’ve been having to give us options if we are ever caught being at the bottom of a street fight.
We went into the standard routines for the warm-up with the normal running, side stepping, hip escapes, shoulder rolls and finishing up on stretches that again required the use of the belt.
As normal, we went over the details of the previous lesson and drilled that a few times to refresh memories.
Now the Professor gave an example as to what could happen if we are pinned down and the person on top manages to get to a standing position, as this could happen, this negates the previous counters taught from the previous lesson. So in comes the use of the double ankle sweep.
IMG_0327
With the hands around the person’s ankles and the legs condensed into the middle of the person ideally on their waist line, it’s a case of pulling with your hands and push with your legs to bring them down to the floor.
IMG_0330
A very simple maneouvre to execute when timed correctly. We practiced this a few times, which also was a good opportunity for people being swept to practice their break fall.
The next detail was how to move once you’ve brought them down. This came down to connections, we would need to put pressure on one of the legs, hook the other leg and keeping low almost walk on your hands up to the top to obtain the mount position.
IMG_0333
With this added detail more practice and drilling was necessary, with different questions being asked and dutifully answered by the Professor. One additional detail was mentioned about preventing people at the bottom from sweeping you by grabbing on to them,
IMG_0353
the answer to that particular problem was explained and then demonstrated, the ending being pretty much the same, ending up in full mount.
IMG_0356
That concluded the evening’s lesson, the Professor made it known that he would be unavailable for friday’s lesson as he was going to be out of the country however, one of his top coaches would be taking the lesson and will be providing information on what we worked on this evening and potentially talking about wrist locks!
My thoughts, this ‘martial science’ that the Professor refers to GJJ as, is exactly that a science and everything is very logical. Some of it feels odd, looks awkward but once you’ve gotten your head around it makes a lot of sense. It can have a very overwhelming affect on you when you realise the different things you’re able to do, to the point where you see people and start thinking about body shapes, strengths, weaknesses and this isn’t just limited to people you don’t know but also people you do know…
“Tapping out”

Chronicles of the arm collector, vol4

New week, same topic… almost… Professor intends to move into double ankle sweeps this week but decided to share additional details on the arm knowledge started from last week. Mainly to focus our attention to how many different scenarios that can bring arm bar/lock opportunities.
Without further ado, we dived straight into a warm up consisting of running, side stepping, backwards running. Then moving to hip escapes and backward rolls. Now we did some different stretches this evening which were new to me but effective. They required use of our belts, focusing on stretching our legs, shoulders, arms and also working core muscles.
Professor then did a quick recap of the last technique taught from Friday’s lesson, which we practiced briefly. He then demonstrated a scenario if the attacker attempts to stand up whilst in the guard, one leg at a time whilst attempting to put one or both hands on our throat. As Professor demonstrated this also gives us an arm bar/lock opportunity, difference being on the emphasis to twist onto our shoulder to secure hyper extension of the elbow joint.
IMG_0282
We practiced this a few times, which was slightly tricky given the awkward position of the submission, which i knew was partly due to not doing it before. Added details were also explained about having a higher guard position on them to drive their weight forward making it harder for them to get up. We moved on to the next technique which involved rotating underneath them to off balance them and take them down to the floor. What isn’t nice for the person being swept is that both arms are caught up in the initial arm bar/lock which means it isn’t easy to break fall. I found this out the hard way and crash landed on my shoulder!
IMG_0284
We practiced this a few more times, i needed to make a small adjustment as I was getting caught against the leg. This was remedied by pushing on the leg to assist off balancing the person in order to execute the sweep. The Professor went on to  show a further variation in the event that taking the leg wasn’t an option was to go for their hip and pull them down to the floor.
IMG_0290
At this point, more explanations came from the Professor about the concepts and ‘fluidity’ of movement to catch someone in the arm bars/locks from different positions and to always be on the look out for them. Understanding positions being the key to knowing how to move next and also to counter certain positions.
IMG_0292
Professor also showed us a more elaborate arm bar/lock manoeuvre involving getting someone lifted into the air and literally ‘dropped’ into an arm bar/lock.
IMG_0300
He also quickly followed this up with it being not necessarily the best arm bar/lock technique to perform in a street fight. Either way we  attempted a few times, being sure to maintain control of the suspended person at all times.
This ended the lesson, Professor was conscious of the fact that a lot of details were shared this evening and made concerted efforts to answer all questions and encourage the asking of questions.
My thoughts, this was again, a valuable addition to last week’s lessons and also gave me more to think about when attempting submissions. However, after the lesson I drilled the different arm bar/lock’s from the closed guard to get more comfortable with attempting them as I find that i don’t do this often enough when sparring.
“Tapping Out!”

Crank it up!

Today we continued the additional details of head lock escapes with added technical adjustments for different submissions.
Professor addressed the class and warned us of two potential moves he was going to teach us to be quite nasty and when drilling these moves to be very gradual with any pressure. Then he said he doesn’t want anyone using these moves in sparring, purely for reasons of safety. Professor was very adamant on this and as always is concerned for everyone’s well being.
We moved into doing a warm-up which was more stretch orientated today, mainly around the shoulders, neck and spine. We then quickly recapped elements of monday’s lesson.
Extra detail added today was centred around a crank which affected the arm, neck and shoulder. IMG_0132
Important details he explained was to make sure to compress arms and then gently push into them whilst cranking the head and neck up. The professor explained what was happening to the vertebrae in the spine with this technique and again warned us to apply this very gently. We practised this a few times, with some minor adjustments being told to us from the observations the professor was making.
We then moved on and talked about a potential escape from this position.
IMG_0135
Details here involved changing the angle with the hand, straightening the arms and creating a frame to prevent the crank to the head.
These details prevent the technique from being done, then once the attempts stop it is then the ideal opportunity to perform the rest of the escape.
IMG_0140
By doing a big hip bump and rotating on to the shoulder you can effectively move the person on top into the position you occupied previous.
IMG_0141
We again practiced this, slowly becoming more proficient on continued repetitions. Professor did however, note a detail with reference to making sure we move the arms and hips together when executing the escape.
The last technique shown for the evening is a counter to the counter. In more straight forward terms, if the top person stops you from rolling them over, you can do a further escape which leads back to the original head lock escapes done previously.
IMG_0159
Professor explained all the techniques demonstrated again to us on the mat this evening, he also progressed on to a more general speech with reference to be respectful to each other, practising responsibly on the mats to make sure everyone benefits. The speech was very well received and in conclusion the professor was very grateful to all people attending and urged everyone to study and practice to get to the next level.
My thoughts, the professor is a gracious human being who has high expectations for us all. He has a simple way of getting his point across which makes learning from him a pleasure. Details tonight involved a fair amount of technical understanding but as always he makes it look very, very easy.
“Tapping out”

The great headlock escapes cont.

A new week and a trip back to head lock counters as displayed in the academy curriculum.
Professor addressed the class with the outline of areas we will be covering this week which will ‘dove tail’ nicely from the details learnt last week.

We proceeded to do the standard warm-up which concluded with a gentle ‘roll’ to get all limbs nicely attuned for the coming lesson.

First detail we went through involved the first head lock escape from the ground which ends up with the ‘headlocker’ in a ‘head scissors’ we learnt.

IMG_0084


The extra details given to us, were ‘what if’ scenarios if we weren’t able to secure the ‘head scissors’ position. The first option was to go through a series of steps that eventually put us in a position to choke them. Getting there required isolating the closest arm, controlling their other arm, maneuvering into a position to obtain the choke then apply.

IMG_0085

Lots of technical details, each making a lot of sense and not too difficult to perform. After practicing this we then did the ‘no-gi’ variation, which had a small difference with respect to not grabbing clothing but getting better connections with limbs. The end result was a choke which was potentially more lethal than the first.

IMG_0104

We then explored a scenario if they were able to get the arm closest to you free, this next part was clever and nasty all at the same time. In the event this happens, shifting your body position so that your in the cross body position over them with both of your arms
under theirs. On the side your pressuring from it’s required to move your leg so that it is underneath their arm and straightened out in front of you. Then the arm that’s exposed needs to be extended so that a straight armlock can be applied, the natural defense for
this position is to bend the arm, at that point the leg that’s extend can fold back in and trap the arm whilst it’s bent. Then to secure the position the other leg comes across and prevents the arm from getting out. The position is actually an ‘Americana’ applied with the legs instead of the arms.

IMG_0120

Professor demonstrated different ways of applying the pressure and it didn’t take much for people to tap. We practiced this and i shortly realised that with my own dynamics, it doesn’t take much to apply pressure and being on the receiving end, this position is very nasty.

This concluded the lesson for the evening.

My thoughts, Professor says this is relatively straight forward, I thought it was complex until I tried it…
The understanding needed of the body to piece this information together not to mention understanding yourself; the previously taught information still fresh in my mind, overwhelming? enlightening? confusing? but very, very enjoyable! I can’t wait for the next lesson!

“Tapping Out”

If you can’t take the pressure… Tap

Midway through the week and we continue the lessons on double leg takedowns.

Professor addressed the class by paying homage to three members of the academy that recently competed in a grappling tournament. All of them achieved medals which of course made the professor exceptionally proud. He then explained the format of the lesson for the evening, concentrating on adding details to the techniques taught in Monday’s lesson.

We started a warm-up which included, running, side-stepping, raised heels and raised knees. We then performed hip escapes, cart-wheels and lizard crawls forwards and backwards.

Professor then discussed some basic self-defense concepts which involved clinching, controlling the arm followed by a knee to the groin, finishing with a hip throw. We didn’t complete the hip throw completely due to the amount of people on the mats.

We reviewed the previous lesson, with the professor going into more detail on hand positioning on the attackers legs, shoulder positioning when the attacker is on the ground and where to transfer hands to move to the cross body position.

We practiced this with an emphasis on connections. Professor then gave an excellent explanation on power vs pressure. Summarised, power can’t be maintained on an individual where as pressure can be via the use of positioning and good connection, better described by acting like a ‘wet blanket’ on the attacker.

This was demonstrated on a few students in the academy so that they felt the difference.

This brought the evening to a close. More concepts are coming our way in Friday’s lesson with respect to dealing with opponents who have more knowledge about grappling.

My thoughts, certain elements of the lesson I remember from other techniques taught to me, however some things aren’t working for me as well as I like, which questions my understanding or possibly my execution. To me if it isn’t comfortable don’t do it, but something that’s new is always uncomfortable! Perseverance and practice needed…

“Tapping out”

What stands up must go down

The dawn of a new week, the start of a new topic, this time we explore options for taking a person to the ground in the form of a double leg takedown.

Professor addressed us on the target details for the week, starting with tonight’s lesson. Areas he will be covering are the basics with the double leg takedown and ways to enter the mount position.

We started a warm-up consisting of running, side stepping , running backwards, knee lifts and raised heels. We also performed hip escapes and backward rolls, making sure to go over the shoulders. We then did an exercise which involved trying to grab a person’s gi for control whilst trying to protect your own gi. We did this a few times, swapping partners periodically and then the professor added a dynamic which involved performing a takedown by placing a foot on the waist and bringing them down.

We then started the lesson on the double leg takedown. Professor explained that this should be attempted from roughly arms distance from your attacker. Any further back and it can end up being bad for you. We then drop height, place front foot underneath attacker, wrap arms around the legs in a manner to squeeze the legs together, then push forwards from the shoulders and pull back on the arms. This will result in the attacker going down.

We practised this a few times on both sides to reinforce understanding of the mechanics.

At this point, once the attacker is down the next objective is to get side/cross body control. Professor explained the process for doing this, involving trapping a leg and moving both legs to the side of the trapped leg. Then securing the cross body position. 

From here, the professor had 3 different variations for obtaining the mount.

Placing hand on the thigh and guiding foot to meet the hand, to wrap the leg around the thigh and underneath the body to obtain the mount.

If the attacker raises their knee against your side to prevent you obtaining the mount then this variation can help. Place arm against the near side hip, create space for foot to be passed to the hand being used to block the attackers hip, the use hand to guide foot across the attackers body to obtain the mount.

The last variation shown makes use of the leg being used to block your mount attempts. This option involves pushing down on the leg, trapping it then moving your other leg across to obtain the mount.

All three were practised several times with varying levels of success.

This concluded the evenings lesson with the professor explaining importance of connections when performing these techniques and eluding to submission options which will be covered during the week.

My thoughts, some good details and I am also  finding it easier to understand as a lot of the principles are being constantly used. My preferred mount option was definitely the last variation as my long inflexible legs found greater success using it. I noticed people with smaller legs preferred the second variation.

“Tapping out”

The mysteries of head locking…

Wrapping up an educational week on head lock counters, the professor addressed the academy congregation present on the importance of sensible sparring, then went into details of tonight’s lesson.
We started off with very light ‘rolling’ to get ourselves warmed up and again advised not to over exert as we are doing this to just warm-up; switching partners as we go.
We then recapped head lock escapes from earlier in the week, emphasising the points when brought to the ground of making sure to be on your side and to defend yourself against punches and head butts.
Professor then went over some added details from the stand up position, this included two additional escapes. The first being if you’re head locked and are still standing but the person head locking you is either attempting to just squeeze or attempt to punch with the other hand. In such a situation it’s important to keep your head turned towards the head lockers body, having one hand on the choking arm and the other braced against the head locker’s free arm. This gives sufficient protection for the moment, to escape the situation requires use of leverage by placing a leg, the one opposite the side your head is trapped, underneath the head locker then performing a squat action whilst straightening from the waist to get up right again. From here an arm lock submission is possible.
Another variation to this is to potentially move the other foot to the side and then straighten which did make executing this counter easier.
We practiced this a while, using varying degrees of resistance to test the technique. The other technique involved taking a person down to the floor. This is achieved by keeping a hand on the free arm or hip of the head locker, placing your hand just above the arch behind the knee, palm up with the fingers and thumb separated making an “L” shape, simultaneously pushing the back of the leg, pulling with the other hand and sliding your leg through the head locker’s legs to bring them down and positioning yourself in a modified mount with them possibly still head locking you. From here the previous drills gave us enough to turn this position into a submission.
We practiced this a few times, the professor stopped us a few times to remind us of safety aspects when doing this manoeuvre, namely to make sure not to land on our own elbow when performing the takedown for reasons that we are on mats and if we ever
had to do this in the ‘streets’ would be landing on concrete! We practiced some more and then brought a close to the lesson.
My thoughts, important details… I think back to some of my ‘skirmishes’ in the earlier part of my life and the headlock plus strikes to the head was such a common attack and probably still is. Plenty more for me to practice…
“Tapping out!”

Obtaining keys to head locks…

A new week… continuation of headlock and baton defence, progressing on from last week’s tutelage on the subject. Professor gave us the break down on the nights lesson accompanied by some philosophical words on head locks, how they can be
obtained and also how common it is for fights to end at some stage in a head lock. At that point i thought back to a conversation I had with my son today… He was in school and a fight almost ensued and the other kid that wanted to start a fight opened up with a headlock followed by a trip attempt. Needless to say, my son managed to defend the head lock and avoided being tripped.
We started the evenings warm-up with a gentle roll/sparring just to get warmed up, swopping partners periodically. We then went straight into baton defence with another attack aimed directly at our head. The principles learnt last week were identical but we learnt another position, which allowed us to protect our head and drop straight into a clinch which allowed us to control the arm with the weapon, options from here lead into either a single leg take down or a knee into the ‘open space’ followed up by a hip throw.
All variations were practiced several times, with the professor scolding us for not being more committed with the baton attack on the head to help our training partners.
Afterwards we went into headlocks, talking about regularity of headlocks being used as a vehicle to take people down. Professor did a quick revision on things to do when in the basic defensive position on the ground, in particular arm positions and body position then began to explain other options available to us if we aren’t able to get the defensive techniques taught last week.
This included variations to hook over the leg to effectively allow you to get up on to your knees and get to the modified mount position.
Bridging into them to lift them and to place your hip under theirs, this particular technique was especially good if they are driving weight on to you, since the connection is there bridging into them lifts their waist off the floor allowing you to drive your hip under theirs. Then it’s a case of rolling them back the other way so that you’re on top.
The last technique taught was if the person head locking keeps moving their leg you’re trying to hook, to potentially remedy that scenario you can hook the other way and lift their leg up allowing you to get underneath them to roll them back the other way… straight into the modified mount.
All of the above was drilled, with an exercise at the end to potentially work different head lock escapes based on what the person holding you were doing. Surprisingly, the options available were numerous and combinations were plentiful.
At the end we spoke more about head lock philosophy which lead into jiu-jitsu philosophy and were encouraged to do more headlock drills in our sparring.
My thoughts, this was a nice addition following on from last week, knife ambushes, baton attacks and head locks does it get much nastier? For now i am thankful I have something to potentially answer some of those questions…
“Tapping out”

Lock, stock and a smoking baton!

Due to heavy work commitments i neglected to write up Wednesday’s account of the lesson at the academy, so I’ll be summarising two nights in one.

Just as normal, we were addressed by the professor on the tone for the week with reference to self defence of batons and also if you ever get caught and end up in a headlock. We had some background philosophy on the regularity of headlocks in street fights and different ways people can try and put these on you.

With the warm-ups on Wednesday, we did running, side-stepping, running backwards and hip escapes. We finished off with a drill to simply try and escape someone’s guard and enter into cross body position or full mount. Tonight we did simple rolling to gently warm up the body.

We then went in and revised the moves from Monday’s lesson and on Wednesday; we had expanded on certain moves when defending over head attacks with the baton. This ultimately lead to the a throw over your head so that the attacker with the baton ends up landing on their head. This is performed if the person with the baton ends up behind you.

Moving on from that position tonight we also looked at another similar throw, which had a different element to it but achieved the same thing. When performing the throw, your hips need to be lower than your opponents. With the added details tonight this throw was performed more by aligning your backside with their thigh and simply walking backwards, whilst bending over to achieve the throw.

After drilling a few times, we then progressed to doing headlocks counters. We again revised Monday’s lesson and the added details taken from Wednesday lesson, which consisted of performing a frame on the person still trying to keep a tight headlock on you. The purpose of the frame is to eventually persuade them, via pain and discomfort, to let go of your head so you can perform an arm-lock. This was drilled with differing levels of success. The professor also showed us an alternative counter if we couldn’t frame. This consisted of going to your knees and putting them on their back.

We drilled this for a reasonable length of time before moving on.

All the extra details added into tonight’s lesson consisted of additional arm-locks, some arm-lock escape counters and a very sneaky triangle setup. One of the arm-lock escape counters involved a method of breaking the ‘gable grip’ which is common for arm-lock defending. The method involved doing an americana type lock on the ‘gable gripped’ arm.

After going through the other details, my mind was literally spinning at the level of detail being shown. The lesson concluded with a final address from the professor to make sure we respect the person we’re sparring with.

My thoughts, the lessons this week have been up to the expected standard and the knowledge transfer is truly amazing. Baton defence will beautifully complement the knife lessons. The only downside probably to the week is that, for me, a lot of the extra details on the mat, will require a lot of adjustment for me to make sure i can be effective. All work in progress…

“Tapping out X2”